

How To Run Backup Camera Wiring In Rv


RV Fill-in Camera Installation Guide
Buy THIS Fill-in Camera Hither!When we bought our Grade C motorhome, it did not come with a rear view photographic camera. Oddly plenty, information technology did come up with a rear view mirror. I guess that would exist useful if you had kids to keep an center on while driving, but for u.s.a. it is useless. So we started doing our research to discover a good quality wired rear view camera. The search took a calendar week as we had to weed through all the Chinese made crap that is out at that place.
Brands like Pyle, XO, Hootoo, Pinnacle and Boyo merely couldn't evangelize. Poor design, poor construction and a bad reputation was all we could observe out well-nigh them. Luckily, we came across the Rear View Safety 7" TFT LCD Color Rear View Backup Camera Organization with Audio. Rear View Safety Inc. is a leading manufacturer and distributor of rear view photographic camera systems in the USA. They have a groovy reputation and their production looked to fit our needs, so we ordered one. Thanks to Amazon Prime, it arrived 2 days later. Here's what was in the box:
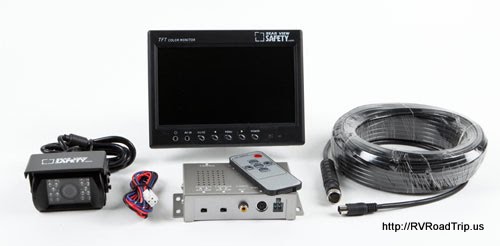
You get one 130° wide angle Color CCD infra-carmine weather proof backup camera, one seven" TFT LCD colour rear view monitor with universal mountain/stand up and wire, 1 3 channel multiplexer command unit, one 66’ extension cable for photographic camera, one Wireless Remote control, one Power connection wire, one Double RCA + power converter, (to connect external, audio video and power), and one screw kit for installation. Earlier you brainstorm the installation, hook the unit upward to make sure everything works. You don't want to get it all installed but to observe out you accept a problem somewhere.
You will need the following to be able to properly complete the installation: a drill, a 3/4" bit, a cantankerous-tip screwdriver, some ProFlex RV sealant, some patience and well-nigh 2 hours. We also used wire ties and some wire loom to secure the wire nether the RV.
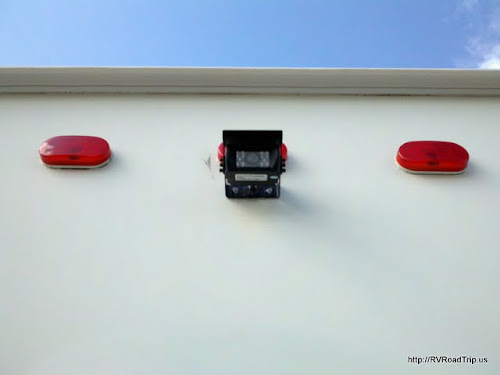
We looked online and saw that every rear view camera on a motorhome was mounted beneath the clearance lights, so this is how we mounted ours. Our clearance lights are kinda low simply 6" didn't make that big of a difference. Using a pencil, we marked where we would drill the 3/four" hole for the wire to feed through. Nosotros fabricated sure there wasn't a wall stud in the way and later on starting the hole, we looked to make sure in that location weren't any existing wires in the style. With an all clear, we drilled a pigsty through the wall.
Considering of where we had to mount the photographic camera, we decided not route the wire through the ceiling rafters. It would take been a tremendous undertaking to try to fish 66' of wire through the rafters so nosotros opted to go through the flooring and under the RV. Our hole punched through inside the kitchen cabinet. I didn't empty the cabinet beforehand and the drill bit tore a whole into a packet of white gravy mix. I taped it upward so we can enjoy that gravy one morning with our biscuits!
I then drilled another 3/four" hole into a nearby wall that is hollow and this is the road we took to the floor. Yet another 3/4" hole was drilled and now the wire is outside. Nosotros fished it all through then sealed it all up with ProFlex RV sealant. We removed the condom grommet that came on the camera as we couldn't go it to fit. We aligned the camera, tested the angle and screwed that sucker in identify. A generous helping of sealant volition keep whatsoever moisture outside where it belongs.
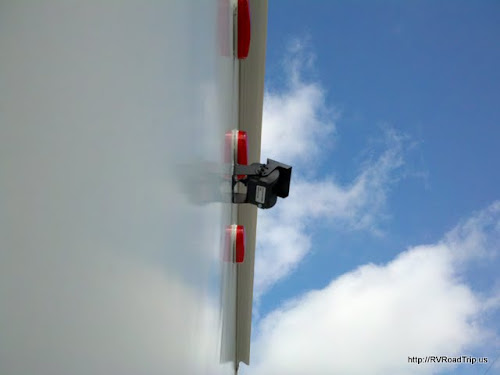
Yes, we cleaned off that smudge in the first moving picture. You lot weren't supposed to notice that! At present the fun part, routing the wire nether the motorhome. Nosotros won't go into detail every bit your routing volition be different than ours, just brand sure to avert oestrus sources and potential pinch points. In one case we had the wire in the cab, we coiled up the backlog and tucked it and the multiplexer under the dash. Nosotros mounted the monitor above the silly rear view mirror. Nosotros connected the power wires to a male person cigarette lighter plug so we can easily remove ability from the unit of measurement when parked. If y'all only want yours to come up on when you are in contrary, connect the blueish wire to your backup low-cal circuit. We twisted the reddish and blue wires together so ours is on anytime we plug it into the cigarette lighter.
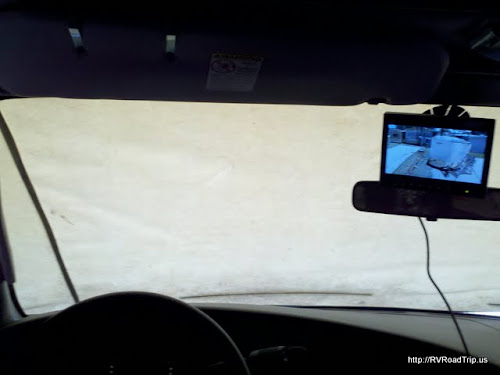
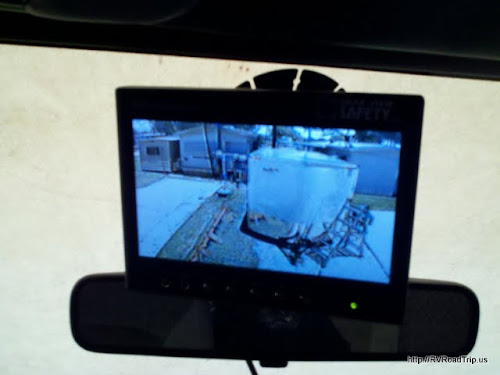
These shots aren't the greatest equally the windshield cover was on, just you lot become the idea. On the monitor you can see our enclosed trailer, our ladder and the park models behind u.s.. We are very pleased with this fill-in photographic camera and it will be a big assist while traveling and when parking. If you lot'd like a photographic camera organisation like this, click the link virtually the pinnacle of the folio. That is the best toll we found anywhere. Warranty is for 1 year. Yous can besides add 1 or 2 more cameras to this system if you lot want side cameras or maybe 1 looking over your entry door. Here is the nitty gritty product info for the tech types:
| TFT LCD Monitor | Camera ane/4 Abrupt Colour CCD | ||
| Screen Size | 7" | Motion picture Elements | 250,000 pixels |
| Dot Resolution | 1440(H)x234(V) | Gamma Correction | r=0.45 to 1.0 |
| Display Format | 16:9 | Image Sensor | 420TV lines PAL:500(H)*582(V), NTSC:510(H)*492(V) |
| Display Brightness | 300 | Lens | 2.1mm |
| Viewing Angle | 90° Min | View Angle | 130° |
| Video Input | 2 channel | Sync System | Internal Synchronization |
| Video Source | 1Vp-p, 75? | Infra-reddish altitude | l Anxiety (eighteen Infrared LED) |
| Power Supply | DC 12V (DC 24) (+/-ten%) | Usable Illumination | 0 Lux (LED On) |
| Power Consumption | 5W | Power Source | DC 12V (+/- x%) |
| Operating Temperature | -10°C ~ +65° C | S/N Ratio | More than than 48dB |
| Video Organization | Auto NTSC/PAL | Electronic Iris | 1/50, 160-1/100,000sec |
| Overall Dimensions | 7" (Fifty) x 5" (H) ten 1" (D) | Video Output | 1Vp.p 75ohm |
| Weight | 400G | IR Switch Command | CDS Automatic Control |
| Bear on Rating | 5G | Impact Rating | 10G |
| Active Surface area | 154.08(H) x 86.58 (V) | Operating Temperature | -30°C - 50°C / RH 95% Max |
| Sync System | Internal | Storage Temperature | -30°C - 60°C / RH 95% Max |
Source: http://rvroadtrip.us/library/backup_camera_install.php
Posted by: murphytorat1997.blogspot.com
0 Response to "How To Run Backup Camera Wiring In Rv"
Post a Comment